Social Media

Showing posts with label outdoor activities. Show all posts

Tuesday, July 8, 2014

Little Garden that Could

We've got veggies! So far, we've been able to harvest lettuce, spinach, chives, basil, cherry tomatoes, cayenne peppers, a few jalapenos and one mysterious lime green pepper. I'm quite proud of my little organic garden that could! I'm excited about the prospect of finding more space and expanding the garden in upcoming years; perhaps we will even have a green house in addition to more raised beds and container gardens on the patio.

For now, I'm just happy with the progress my garden has made and all of the hard work that my husband and I have put into it.

My two cherry tomato plants yield a handful of these juicy fruit every two days, perfect for tossing a few on a salad at lunch time.

organic grape tomato plants  in patio garden

Will someone PLEASE tell us what these are? I didn't plant anything that should look like the peppers below but alas, here they are. They haven't gotten bigger or changed colors in the last few weeks so I'm thinking this is their mature state. The flavor is mild, slightly sweet, not at all spicy. Thoughts?

light green pepper

The cayenne bushes below are multicolored but the purple ones always pop out first. If it's anything like last year, I expect the yellows, oranges, reds, and cream-colored peppers to show their faces towards the end of summer.

ornamental cayenne pepper organic

There are plenty of heirloom and mater sandwich tomatoes, rainbow sweet peppers, Carmen red peppers, jalapenos, and cucumbers popping up each day. It seems like we will have a steady supply of veggies throughout the summer and into Georgia's warm fall.

These guys are about as long as my forearm! But why oh why won't they hurry up and turn red so that we can eat them?! I've read great things about Carmen red peppers on the Park Seed website and I want one in my belly. Now.

organic long red sweet pepper in raised bed garden

Alejandro loves the jalapenos. We will have plenty for salsas and jazzin' up dishes this year.

organic jalapenos in raised bed garden

My first year growing heirloom tomatoes. I'm in love. They're so beautiful! They single-handedly make my garden look more professional.

heirloom tomatoes in different stages of growth

It's my first year having cucumbers, too, and I have really enjoyed watching these guys grow. They're the most entertaining plants in the garden with their lovely large leave and twirling tendrils. I particularly like how spiky the fruit is before it smooths out.

My husband's coworker shared three large cucumbers last week. His garden gets 8 hours of sunlight so everything is ripening much faster. My garden gets only four hours with two additional hours of speckled sunlight so progress is slower. Womp womp womp. But hey, it's coming right along!

growing cucumbers

Mater sandwich tomatoes are interesting at different phases. Sometimes they're  striped, other times pale and even-toned. I can't wait to taste them.

growing mater sandwich tomatoes with trellis in a raised bed garden


organic mater sandwich tomato with twine trellis in raised bed garden

I'm not sure when the strawberries, blackberries, and blueberries will come to maturity. The bushes are getting bigger but no consistent blossoms just yet. All of them are in positions to get 6-8 hours of sunlight a day so hopefully we'll get some delicious fruit towards the end of the season.

The weather has been much more pleasant than last year. We've welcomed hot sunny days with cooling showers in the late afternoon. The leaves have plenty of time to dry before nightfall, avoiding mold and mildew. This system has minimized how much I need to water the garden.

It seems that the plants are much more resistant to disease and weirdness than last year, too. With the exception of one cherry tomato plant (old seed) everything has come up nice and strong. Starting the plants in the BioDome helped because they were stronger and healthier as transplants.

The condition of the soil is also a factor. Having nutrients worked into the soil before transplanting gave them a great head start, versus trying to fertilize the plants from the top down after they were already in the ground. I haven't done too much additional fertilizing in the past few months. I've used Jobe's Organic Heirloom Tomato and Vegetable Food when I transplanted. About two months later, I used Espoma Organic Plant-tone All Purpose Plant Food mixed in with used coffee grounds donated by my local, independently owned coffee shop The Cupbearer Coffee and Tea Outfitters.

organic vegetable fertilizer and coffee grounds


Raking in the fertilizers was scary at first. I raked up the top layer of soil about 2-3 inches and then froze--I had exposed a few hair-sized roots.  I thought I had damaged the plants! Since the supposed damage was already done, I sprinkled a mixture of Plant-tone and nitrogen-rich coffee grounds into the soil and watered the plants thoroughly. Within a few days, the plants had a noticeable growth spurt. The few tiny roots that I interrupted didn't seem to bother the plants.

I haven't applied much in terms of pest control. I'm still using Safer's insecticidal soap but not consistently because of the evening showers that would just wash it away. I only apply it when I have a few days' forecast without rain. The biggest garden helpers have been spiders. I wasn't well-versed on them last year so I would just kill everything that I saw. This year I know better. The spiders been great at munching on winged pests though they don't seem to have a taste for the little worms that eat holes in the leaves, hence my need to spray occasionally. I spray around my spiders' favorite hangouts so that they aren't hurt. (I painstakingly pick off the worms in the areas where I don't spay.) So far, the spiders don't seem to mind. They still eat whatever happens to fly into their webs.

Monday, May 12, 2014

Drop the Bass and Do the Florida Weave, Y'all!

Everyone says the same thing about the Florida Weave when they first hear it: "Is that some sort of dance?" or "That's a hair style, right?" It's not either. It's a method of supporting tomato plants that is cost efficient and more aesthetically pleasing than alternatives.

Last year, we bought several cages for our determinate variety tomatoes. The bottoms of the cages bent as we pushed them into the hard Georgia clay. Over the course of the season, the thin metal frames warped and lost their shine. Buying stronger, vinyl-coated cages for this year would have been an option but at $8 a pop we would've spent nearly $150 and the cages still might not be tall enough to fully support the plants.

I set the cages aside to support my pepper plants (which need less support anyway because the center stalk is so strong) and turned my attention to different support methods for tomatoes. After pricing out a variety of supports, my husband and I opted for the Florida Weave. 

We first constructed 10' tall support posts that are built into the raised beds and buried 2' deep. (The visible support is 8' above the ground.) That sort of support post is not necessary but we felt they would be sturdier, longer lasting, and prettier since they were made of the same pressure treated pine wood as the raised beds. Some gardeners use metal T posts or U posts as supports. Those are strong and work fine but as the soil settles, thin metal posts can lean and look a bit messy.

We then drilled 1/2" holes into the posts.


In areas where we needed to make adjustments, we just drilled a few pilot holes and added 1/4" hooks. Doing this was safer than trying to bore 1/2" holes into the 4"x4" posts with the little plants around. If your measurements are right the first time and your posts line up perfectly, you won't need this step. But we aren't perfect!


The twine weaves in and out around each plant before circling back to bob and weave in the opposite direction. Overhead, the twine makes figure eights around each plant. Garden Betty put together an excellent overhead image of two spacing options. Ours is most like the first option. The second is recommended for much longer rows.
Aerial view of the Florida Weave
The horizontal and vertical spacing between the twine is debatable. Garden Betty, for example, opted to have each side of twine nearly parallel, so that the stem is cradled in the little gap. This spacing provides a lot of support for the stem but it will also require more twine. If woven too tightly, this arrangement can slice into the stem.
Trellising tomatoes with the Florida Weave
via Garden Betty

Garden Betty has 8" between each vertical layer.

In our garden, each single line of twine is spaced about 6" apart. The stem is still nestled between the twine but in a but more of a relaxed S shape. As the plants get thicker and stronger, I don't think the spacing will be a problem. 

Florida Weave tomato support

Some  gardeners, like The Kale Yard, have even more space between each line of twine, though the blogger admits that this isn't the best option. The twine was added after the plants were already quite large.
via The Kale Yard

With any spacing arrangement, some plants will grow faster than others. In our case, one corner of the garden had three short plants among five taller ones. No problem. Just keep an eye on them and gently tuck them through the twine once they're tall enough.


I like the end result and I especially like the price tag! The posts were expensive at $12 each but since they're doubling as Florida Weave posts and emergency row cover posts, I'm pleased. 110' of  twine costs less than $5. Overall, we will need about $15 of twine and we're done!


Thursday, March 20, 2014

It's Spring! Last Minute Tips to Get Your Garden Ready

Welcome to Spring, the official beginning of terrific weather, sunshine and refreshing showers. The southeast has had an abnormally crappy winter (not that the midwest or northeast had it any better) and Spring couldn't come fast enough.

Some of you lost track of the calendar as one bleak, gray day blurred into another. Spring has caught you by surprise--you've got nothing done in your garden but it's not too late! If you start now, you've got plenty of time to get your garden ready for late spring and summer harvests.


It's not too late to start your seeds indoors. Several plants, especially peppers and tomatoes, do well if you start the seeds indoors in a controlled environment . Ideally, you should start 8-10 weeks before the last frost date. (The last frost date for Atlanta/ Zone 7 is listed anywhere between the end of March to the middle of April.) But there is still time! The southeast has a long growing season so you can still get an ample harvest even if you're falling a bit behind schedule.

You can buy a starter kit, which I did this year. I still recommend DIY seed starters to conserve resources. Recycle small plastic containers like yogurt cups, strawberry pints, or the little black containers that plants come in at home supply stores. Just be sure to select a plastic that is easy to cut through when it's time to transplant the seedlings. Also be sure that there is a hole in the bottom for drainage.

Next, fill your container with Fox Farms Light Warrior Seed Starter. It's the best seed starter that I've used, hands down. It's ultra light, making it easy for little sprouts to push through. The material holds the right amount of moisture so you don't have to water  it every day and risk water-logging your seeds. Lastly, it's got good nutrients to give your plants a healthy head start.
I started my seeds in recycled containers filled with Light Warrior and a Bio Dome by Park Seed Co. Both are on top of a heating pad. I put the dome from Park over the seeds in the recycled containers since I started those later and they need  the warmth for a little boost :)

Once your seeds are sown according to their instructions, find a sunny spot near a window and be patient. Lacking sunlight or patience? Put your seed starters over a heating pad or heating blanket. Set the temperature between 65-80 degrees, depending on what you're growing and how much light is available to naturally heat the soil. The additional heat will jump start germination. Even if you have a sunny spot, you can use the pad in the early morning and late evening to prolong the soil's warmth.

Prepare your outdoor soil for direct sowing. Ideally, you'd have your native soil tested in the winter so that you know exactly what your soil needs. Soil testing through a local university extension takes several weeks. Oops. Too late for that. There are ways to work around it.

You can buy a home testing kit for your native soil at a garden supply store or online (expedite the shipping). Those tests can be completed in a day. I recommend working with native soil (at least in part) for gardeners who are working with large spaces since this method can be most cost effective.

The second option is to start a raised bed or container garden. Fill your bed with store-bought garden soil and fertilizers. Bagged soil has its nutrient composition on the outside of the bag so that you know what you're dealing with already. I recommend this for smaller garden spaces simply because store-brought soil can be quite costly.
A few of my pots, cleaned and ready to go!
My faves are the rustic cauldrons, a gift from my mom.

Are your tools ready for use? Do a walk-through of your garden and gear:

  • Check hoses and nozzles for drips, gaps, and other damage that could have occurred during the winter. 
  • Sharpen your metal tools--it makes weeding and digging so much easier. 
  • Buy your plant supports now since you'll want those in place soon after you transplant the seedlings; if you wait until the plants need the supports, you run the risk of damaging the root system when you shove the support into the ground. 
  • If you let soil sit in your planters and pots over winter, dump it out and sterilize the vessel. (A simple clean with warm soapy water will do. Rinse well and let it dry.) Some diseases, bacteria, and harmful pests can overwinter in containers. It's best to start fresh when you can.

Tuesday, November 19, 2013

Central Park: Something for Everyone

Central Park in Cumming, GA has something for everyone with a great social atmosphere.


Trails
We've been going to Central Park quite a lot lately now that the marathon training is in full force.   The one mile paved trail is convenient for easy days and recovery days where I run three miles or fewer. Anything more than three laps around the loop becomes mind-numbing.

The park has a few hills that are great for building leg muscles, which will help with speed in the long term. There’s an insanely steep hill on the south end of the park heading down towards the creek. Look for the lone weeping willow. The more gradual hills are towards the southeast. I’d run up and down these with my husband a few times each week for about two weeks.

Mountain Biking
I’ve gone mountain biking with my husband about four or five times here. The trails aren’t labeled very well anymore since park staff is rearranging and rehabilitating some parts of the park. Generally speaking, most of the course to the northwest of the park is green. Going southbound is gets into blue territory with a challenging patch under the trees in the southeast corner of the park. I hate this area. Repeat: hate.  It’s riddled with roots, rocks, gravel, and death-inducing pump tracks that have sharp pointy rocks at the bottom and slippery roots at the top. Real mountain bikers generally like these challenging parts, though. I just want to cry. *Sorry hubby*

Image by Kurt Picker
I’ve never touched the black trail. Myth tells me that it’s a cardio challenge up a huge mound that use to be a landfill. The mound rests in southwest overlooking water purification center. The hillsides are steep and the path is narrow in some places.

Disc Golf
The park staff recently rerouted the disc golf course. Chaos ensued. People who like the old path are still taking it, generally working in the opposite direction of those who are following the new course. Overtime, I think people will get use to the new arrangement but for now it’s a cluster-mess of flying discs.

Quite a few pro players come out to test their skills here. It’s a decent challenge, with a variety of terrain and obstacles to overcome. Most of the trails do not interfere with pedestrian access to the park, which I like. As a rookie disc golfer I like being able to practice without the fear that I’m going to knock someone’s head off.

Facilities
The onsite gym is great for exercising on rainy days. It does require a membership,  though,  which is competitively priced to other gyms.

The facilities are maintained quite well from what I’ve seen. As far as complaints go, some request more short term storage for those who simply want to walk the indoor track, take a class, or play basketball without having to leave valuables in their car or on the sidelines. The lockers are in the upstairs weight room, a short trek away. What? If you’re at the gym to exercise, why complain about walking upstairs to the locker rooms? It’s called exercise.


Atmosphere
The best part about Central Park is the active atmosphere.  There is always a decent crowd of (generally) kind and good-spirited folks.Seeing people of all ages walking, jogging, playing disc golf, soccer, football, softball,  baseball, and cheerleading is really encouraging. It makes you want to be more fit!  The people-watching also makes the repetitive runs around the track more entertaining.

If you live in Forsyth County, you should definitely check it out!

Tuesday, November 12, 2013

Winter preparations for spring gardening

My little plot isn't fit for winter gardening. It gets zero sun. The good news is that I can focus my free time elsewhere (maybe learning sign language, touching up my Spanish, home decor, and marathon training). 

More good news? I have time to prep the garden for next spring. I got such a late start gardening this year. It will be nice to be ahead of the game in 2014. I've compiled a list of ways to prepare your garden for spring. Hope it helps fellow beginning gardeners!

Image via terrysliceoflife blog
End of season sales The end of the warm months is the ideal time to scope out season clearances. Many stores get rid of their inventory in preparation for holiday decor. They will certainly want the old inventory gone in time for next spring's arrivals. These sales will allow you to stack on up durable goods at discount prices: gardening supplies, tools, fertilizers and mulches. Buy a few bags of fertilizers each month, spreading out the costs of starting the new garden.

Clean house Remove any plants that have reached the end of their lifeline. Removing them prevents mold, pests, diseases, viruses, and all sorts of nonsense from working their way into surrounding plants and soil. Toss old plants into the compost bin unless they've already bolted/seeded.

Ground cover While ground cover isn't necessary, it is a great soil conditioner. Many gardeners prefer alfalfa and soybeans. Both add nitrogen to the soil and their presence prevents erosion in winter rain, frosts, and melts. This is particularly helpful for raise beds that aren't reinforced with wood or plastic.
http://tomatoheadquarters.com/tomatoes-farm/mulching-for-winter-garden-protection/#!lightbox/1/
Image by Cyndy Crist

Mulch the beds If you aren't using live ground cover, consider mulching your plant beds. It's best to do this after the first frost; in theory, it keeps the ground temperature even. If the ground is frozen, it will stay frosty. You'll have fewer pests trying to burrow in it.

Continue composting The composting process slows down in the cool winter months but it will continue nonetheless. Keep adding to your compost heap or bin and turn the compost every four to six week. In late winter, blend your compost into the soil so that it will acclimate. Without this settling time, an unbalanced compost may continue to breakdown around your young plants and seeds, which can cause more harm than good.

Add garden buddies Don't forget to add earthworms and ground beetles to help micro processes continue in your garden. Don't worry about them freezing. That's rare here in the southeast and when it does get nippy they just burrow down further into the soil.

Image via todayshomeowner.com
Sterilize your pots and containers This is new to me. Remove old plants from your containers, empty the soil, and clean them with warm sudsy water. This way, they don’t carry old diseases to your new transplants or seeds.

Tool preparation Take a few days during the cold months to sharpen your tools and repair any equipment. Do as much as you can indoors, of course. By investing a little time here and there, you will be in tip-top shape for spring without much effort.

Tuesday, September 3, 2013

Soil preparation: surprisingly complicated and interesting

My little garden stressed me out through the beginning of the season! I can recall nights when the rain was pounding down and I lay in bed hoping that the entire garden wasn't washing away down the hill. I don't have enough Creek or Cherokee in me for a proper rain dance (>20%, meh) and even if I did, I don't know the antirain dance. Controlling the rain wasn't an option so I switched my focus to soil improvement.

improving Georgia clay for gardeningGeorgia clay is tough to work with: crappy tilth, no drainage, and it forms crust like concrete. Roots have a hard time developing in its solid encasement. When wet, leeching pulls nutrients from plants, leaving them weak and yellow. I wonder how Mississippian tribes managed to grow anything down here. They certainly knew a few secrets I haven't figured out yet.

For the fall, I'm focusing on expanding my understanding of soil. Ideally, I would have the soil tested for $15 through the local UGA Cooperative Extension Office. Unfortunately, they said it would take about 5 weeks to get the results back. It's already early September and I would miss a big window of fall sowing if I waited on the results. Ugh. Rookie timing mistake, again.

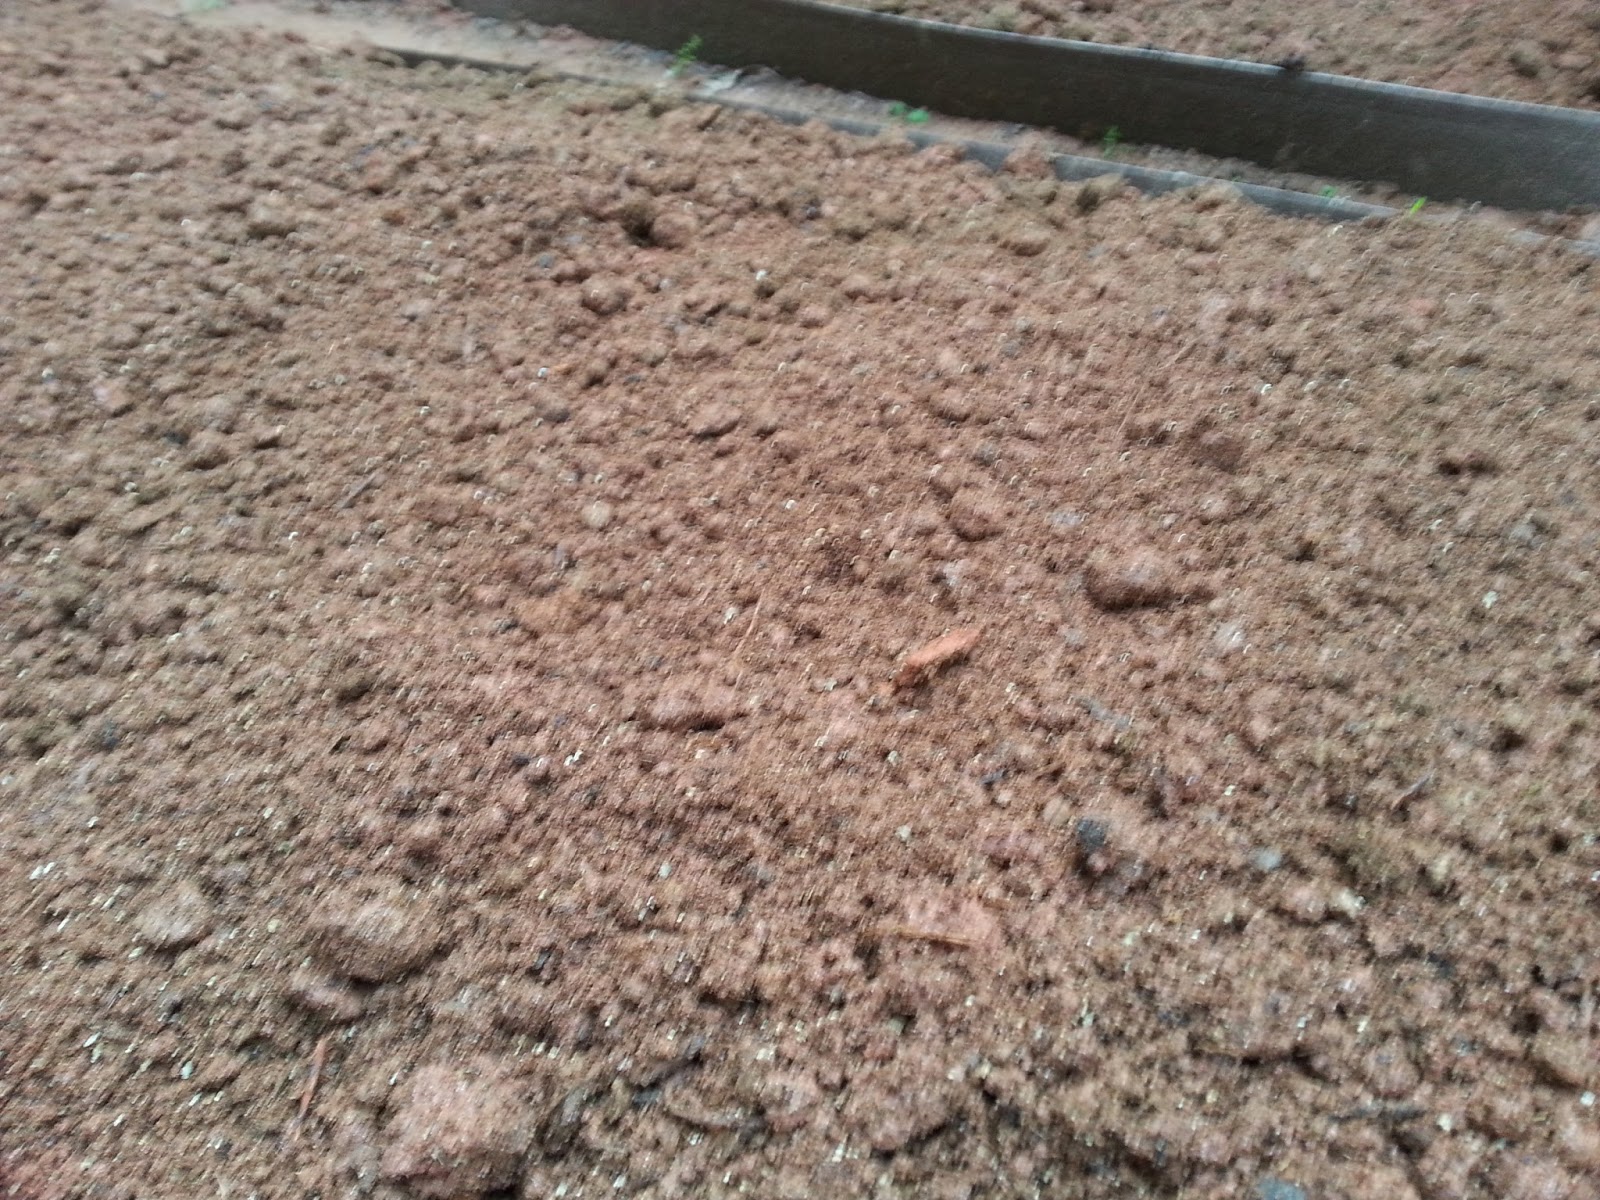
I used a few online resources to test the soil myself. I concluded that I need sphagnum moss and a bit of vermiculite to promote drainage and better tilth. I overturned the rows about 1' down, added in about 1.5" of moss and a dusting of vermiculite, then overturned it all and mixed it in with the shovel. I broke up the chunks even finer with a rake. I may need more but it's a start.

I added homemade compost that has been prepping for over 6 months. It's lovely, crumbly soil with a slightly sweet smell. That's a good sign. The downside is that I added eggshells and they break down at glacial speeds. They're finely crumbled and I don't think it will be a big problem but the little white specks look strange in the soil. When the shells do break down, my children and I will have a nice bit of calcium in the soil.

amendments for clay soilTo keep the rows tidy and to minimize erosion, I'm using Master Mark terrace board to uphold my raised beds. In the future I want to upgrade to a more aesthetically pleasing wood but for now the plastic will do. I still feel like I'm testing this gardening thing out and I don't want to turn the garden into a money pit.

Within each bed, I'm placing more emphasis on leveling the soil. It's common sense but I didn't pay much attention to it before. Being on the bottom of a hill is tough enough without having raised beds that slope. With the border in place, I can level out each bed so it acts as a separate terrace.

When it comes to excess water, more hours of sunlight would definitely help. The house is the biggest cause of shade during the day and it ain't going anywhere. Cutting down the large trees near the garden would certainly let a few hours of sunlight through... but cutting down trees for a garden just doesn't seem right. The trees keep our energy bills lower in the summer and they're good for the cleansing air and all that. Hacking down trees for the sake of a small veggie garden is backwards. And I like trees.

Hopefully the soil amendments will be enough. Next up, sowing time!

By the way, if there are any more experienced gardeners who would like to contribute their two cents, please do! I'm always eager to learn from those who've walked this road before.


Tuesday, August 27, 2013

Let there be life!

By July the organic garden was doing fairly well. It wasn't easy getting there, though.
organic gardening in Atlanta
This is one of the larger harvests of the month. Humble beginnings!


The weather gods are against me. Days of 90+ degree heat have been intermittent with deluges. The soil started to erode in the frequent downpours, exposing some plants' roots along the perimeters of the rows. I hadn't amended the soil properly beforehand so what wasn't eroding near the edges began to form puddles near the middle. It was a hot mess.

I knew this would happen, to an extent. Georgia's clay is horrible with water management but in my haste to get the garden started I figured it would be okay for the first season. (My mother had a beautiful flower and shrub garden. Veggies couldn't be that different, right? Wrong.)

As a short term solution, I bought topsoil and added it to the rows. The chunky little bits of wood slowed the erosion and minimized the puddles at the surface. The added soil also covered the exposed roots. Once the weather became a bit more merciful, I added liquid fertilizers and diligently applied insecticidal soaps to fend off critters that tried to take advantage of the fragile plants. Shame on them!
tips for organic gardening
Slowest. Change. Ever.

The quick-fixes worked long enough to let the batch of plants produce some promising fruit. The Bonnie Patio Tomatoes--so named because the plants only grow 3 feet tall and can fit in a patio container--were the first ready to harvest. Our tomatoes are DELICIOUS and they're still giving fruit now at the tail end of August.

The Bonnie Red Bell Pepper and Bonnie Yellow Bell Pepper plants consistently bare large fruit (5+" long and about 6+" in diameter) but they take weeks to change color since they aren't getting as much sunlight as they should.  When they finally change, they are very flavorful and I love their brilliant colors. So delicious and lovely, in fact, that I refuse to cook them. We only eat them fresh so we get the full enjoyment of the nutrients and color.

Next, the Sweet N' Neat Cherry Tomatoes by Park Seed that I started from seeds began to mature. They produce the cutest little cherry tomatoes and I get 10-20 per week. I slice them in half and pop them over salads and omelets.

The herbs were most difficult to grow outdoors, surprisingly, but I'm not sure why. First problem: Georgia heat can be a beast. Second problem: the seeds are by Weeks Seed Company, a small business without a very strong reputation. Third problem: they seeds were stored at this local nursery. Only God knows how old they might've been. So many of the seeds were duds.

tips for organic gardening in Georgia
Nom nom cherry tomatoes!
I did manage to get some decent chives and parsley out of the bunch. The basil hasn't matured yet (my fourth try) and the cilantro hasn't gotten beyond a few small leaves and scrawny stalks. I know better what to do when the cooler months arrive.

My Sweet Rainbow Blend Peppers and Cayenne Blend Peppers, both grown by seeds from Park Seed, will be the last to mature. I know Alejandro is excited about the homegrown cayenne and I personally can't wait to add the multicolor peppers to some sort of sautee or stir fry. More to come!

Thursday, August 22, 2013

Giving organic gardening a try


organic gardening ideasDuring my time in the Peace Corps I learned a bit about gardening. It was mainly from my neighbor--whose name escapes me after three years--but she was a senora with a heart of gold. She maintained an immaculate, quaint garden and her husband herded a few cattle and horses. Aside from Jesus, they were probably the best human beings ever created.

There was something about the peace of their household and the contentment on their faces each day as they settled down to a homegrown meal...I'm convinced that there was something to this gardening thing. Health was a clear benefit. They were pushing 90, quick as whips, more fit than 90% of the folks at my LAFitness, and aside from a few smile lines you couldn't tell that they were ancient.

organic gardening tips
Add caption
Years later, with my own little house in the burbs and two acres of land, I've got a chance to try my hand at gardening. At the tail end of March, after several late frost, I realized that I has already lost precious time.

My husband jumped into overdrive. We selected  a plot of land on the side of our house that is about 20x20. It's elevated on three sides, like a giant raised bed, supported by retention walls made of railroad ties. (It was part of a gift from my father-in-law and fiancee at the time because they knew I wanted a garden.) Georgia clay sucks, so I took a shovel and turned over the dirt at least a foot deep throughout the entire area. Then we rented a tiller to loosen the soil even more. Finally, we made three rows about 4 feet wide with 1.5 foot aisles in between.

It's not the perfect spot but it is the most perfect spot that we had available. The plot rests at the bottom of a hill so water sometimes drains down. We drilled holes in the retention wall and lined the area in the back corner with stones so that the water could drain out.

The space gets about 4 hours of direct sun and the rest of the time it's partly shaded. Again, not ideal, but it was the clearest space near the house and we didn't want to cut down and uproot lots of trees.

So...we had our garden. It wasn't until the beginning of April that I put down the first few transplants that I purchased at Home Depot: 3 determinate Bonnie tomato plants, 2 red and 1 yellow bellpepper plants also by Bonnie. They made the space feel more authentic while I waited for my seeds to germinate in the soil. Not knowing how quickly spring would turn into scorching summer, I planted lettuce, spinach, and chives. I also planted red cabbage and collard greens.

Just as the first leaves of lettuce and spinach began to peak above the soil, the weather changed rapidly. Two weeks of intense heat were followed by a flash flood that caught the entire county by surprise. The newly sprouting veggies didn't stand a chance. The one row of lettuce that did make it through the deluge fried in the sun the next day. The transplants and a few heads of cabbage were the only survivors.

I had another batch of seeds germinating indoors so I was able to pull out the goners and replace them with some plants that might stand a chance. I also sowed a few more seeds directly into the ground.

Only time would tell.


Tuesday, July 31, 2012

Meteor Crater aka Could've Been the End of Us All


Me, fighting the wind, at the top observation deck.
After leaving the Petrified National Forest and Painted Desert, we took I-40 south towards the Meteor Crater, also known as Barringer Crater. It’s an uneventful drive, to be honest, dotted with cheap tourist traps and sleepy towns. (“What’s with the all the freakin’ dinosaur statues?” My fiancĂ© was nearly pulling his hair out at the sight of them by the end of the drive.) Once you turn to Meteor Crater Drive, there is another long stretch through the flat lands that are accentuated by round signs that pop up from the terrain advertising the park, facts about the meteor, and other fun desert weirdness.
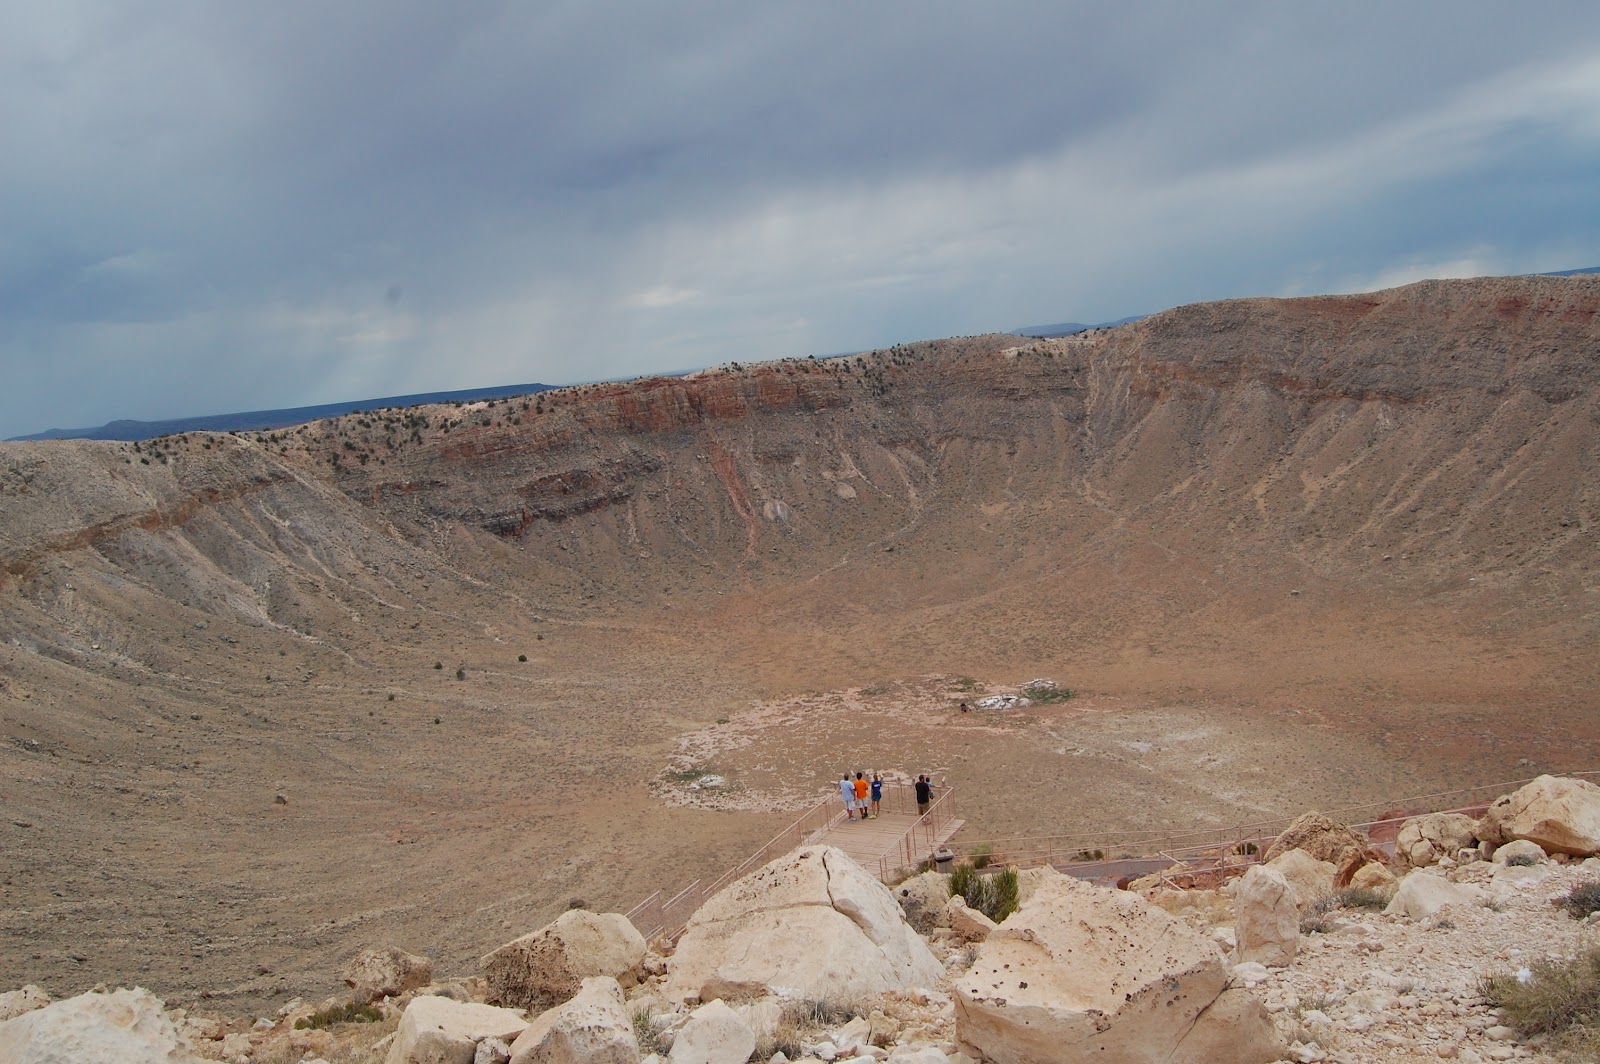
The rim of the crater rises about 15 stories from the landscape, broad and flat like a natural plateau. The entrances to the lookout points and museum require an ascent (via stairs or an elevator) of about two stories. Even with the guardrails I was afraid of losing my balance and tumbling into the crater somehow; my small frame wasn’t much against the storm winds blowing in from the south. I clung to the handrails and made my way towards the top of the lookout point. The storm cell’s ominous clouds serve as a backdrop to all of our photos.
Full view of the crater, from museum doorway.
The view is breathtaking. The massive crater—two miles around, one mile across, and over 500 feet deep—burrows into the earth with an eerie beauty. When it landed, it would have killed everyone and everything for miles but now it’s harmless and awe inspiring. Though it’s hard to tell from the observation deck, the crater isn’t quite round. The edges are quite squared, which is more easily seen in an aerial view; some believe these corners is due to jointing in the strata.
In the depths of the crater are an array of strange materials placed there by early researchers and astronauts in training: a grill, a 6 foot tall astronaut with a flag (which is barely visible from the rim) and a small structure. I thought those things were a bit distracting to be honest and wish that they would’ve removed everything but the astronaut maybe. Aside from being funny, he gives viewers a good point of reference for depth perception. The other items just looked like trash at the bottom of a bowl.
A piece of the troublemaker!
My fiancĂ© and I descended the staircase (hold on!) and passed briefly through the museum. I recommend spending more time in the museum especially if you have pre-teen and teen. Kids in that age group really seemed to get the most out of the exhibits. They were informative and had a few interactive elements that I liked. My favorite was a chunk of The Holsinger meteorite that formed the crater. I wish to God that I could’ve tried picking it up, just for fun, to get a better idea of the size and mass of the meteor that hit the earth so long ago. (Note: don’t try picking it up. You can’t. You’ll probably be arrested, aside from looking really stupid.)
I’d recommend a few of these tips to fellow travelers:

-Don’t rush. Giving yourself time to soak up the natural beauty around you is part of the fun. If you’re in a hurry, it’s easy to see the painted desert as some colorful hills and the meteor crater as a hole in the ground. Stop, think, and seriously enjoy them!
-Eat a lot before you set out. The food options are few and far in between. Stopping in Flagstaff and Winslow are your best bets but even then it’s slim pickings, especially for those with dietary restriction or a hatred for chain fast-food establishments.
-The informative stuff matters. Take the time to watch the videos, read the placards and whatnot. Understanding what you’re looking at enhances your experience exponentially.