Social Media

Showing posts with label kitchen garden. Show all posts

Tuesday, July 15, 2014

DIY Soaker Hose Irrigation

The metro Atlanta area has some insane droughts and heat during the summer. I don't particularly mind the heat but my garden does. Last year's drought meant that I spent 30 minutes in the morning  watering the plants pretty much every. single. day. On super dry days I'd water in the evenings, too. That is a HUGE waste of my time.

Since my garden spaces are spread throughout the property and awkwardly shaped, I couldn't set up the sort of automatic sprinkler that you would see in front lawns. My husband and I opted for a soaker hose irrigation system set on timers. 

The soaker hoses themselves were inexpensive. We got 100 feet  for $20. The multi-zone timers were the most expensive at $30 each and then the little connectors needed  were $4 each. We needed several of those because our garden boxes are unique shapes. 

drip system irrigation for gardens

The setup is simple:
  • Draw out your irrigation plan and take the proper measurements 
  • Cut garden hose
  • Attach connector (there are males, females, and then T and L shaped options depending on what you're doing) 
  • Tighten clasp that unites connector and garden hose with a screwdriver
  • Insert length of soaker hose needed to fit your garden space
  • Tighten clasp that unites connector and soaker hose with a screwdriver
  • Secure end caps where you want water flow to stop
  • Repeat as needed
We put plumber's tape on the connectors to guard against leaks. We also used stakes to hold the hoses in place but in retrospect that isn't necessary. Having the hoses staked down makes it harder to weed  the garden. The wind isn't going to blow the hose away either since it's set down into the raised beds. We could have saved about $25 without the metal stakes.
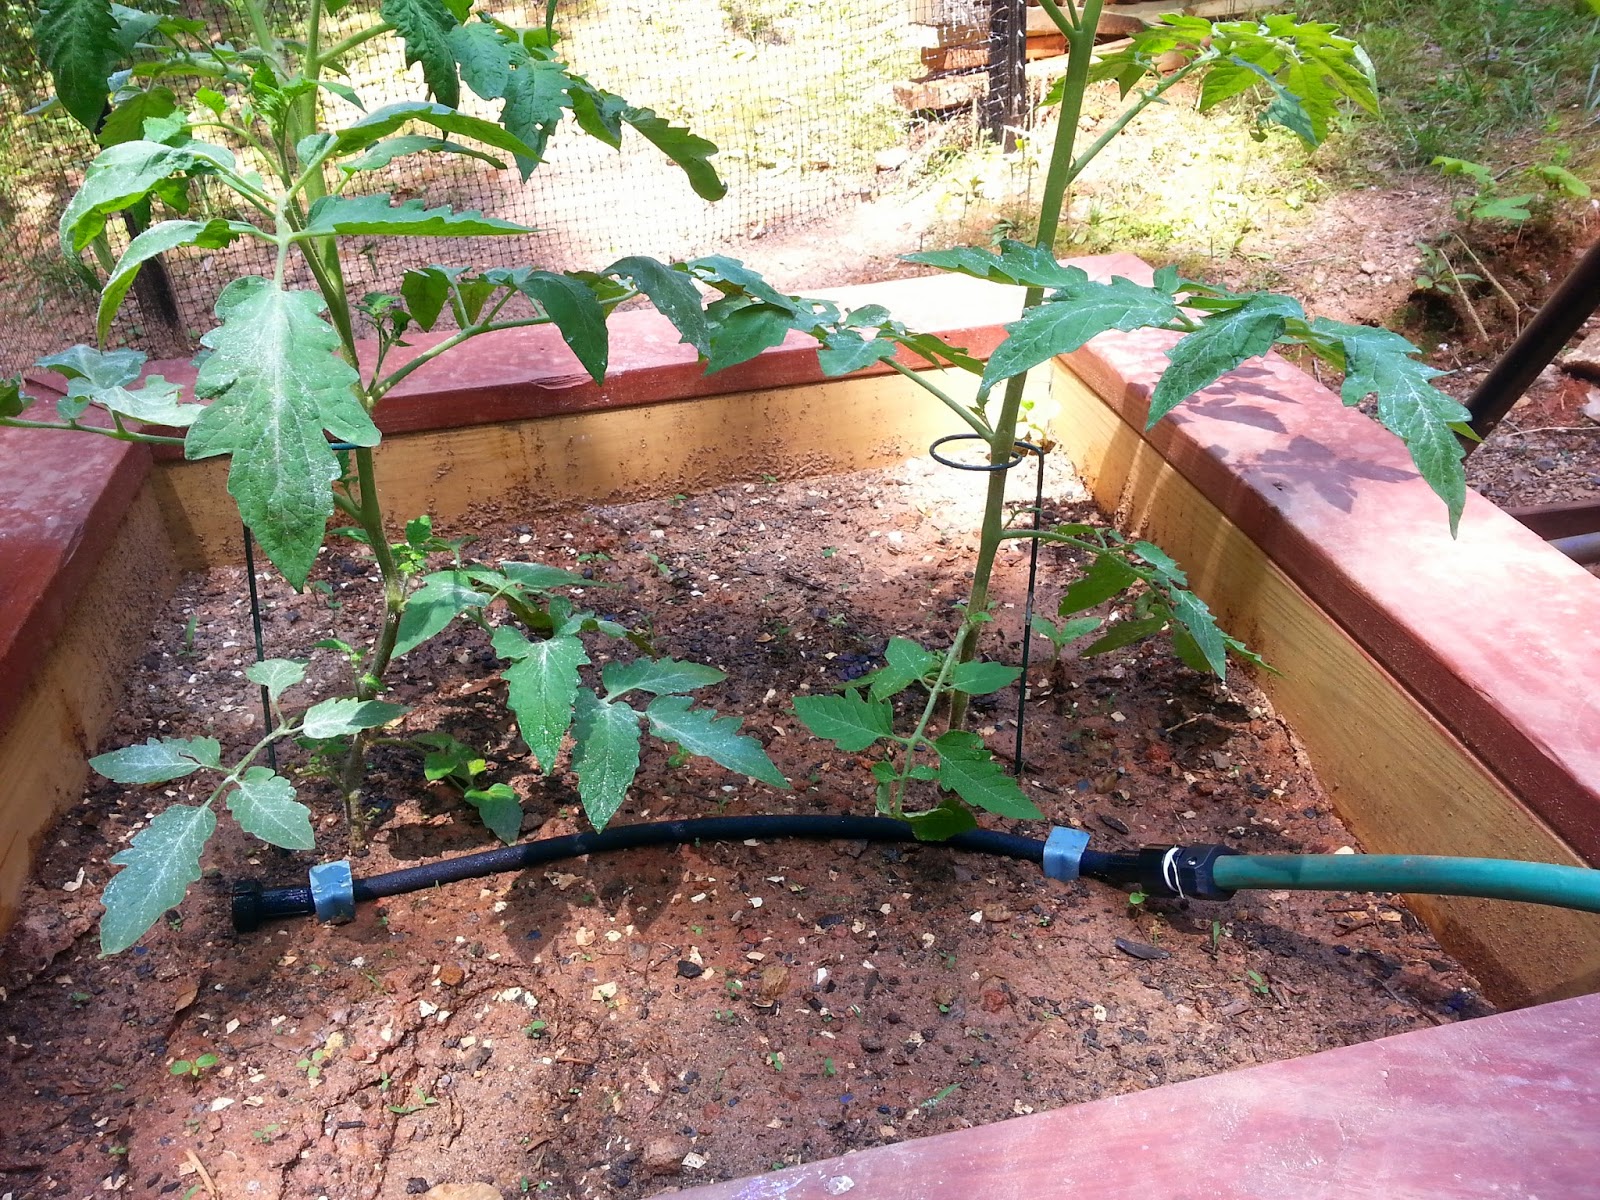

drip system in raised bed organic garden


drip system irrigation in organic garden

how to install drip system irrigation in raised bed garden

installing drip system irrigation in raised bed gardens


The Melnor's AquaTimer devices are user friendly and pretty self-explanatory. We have our L shaped and funky quadrangular bed set to water at 5am and 5pm for ten minutes. On the other side of the house, both beds are watered at the same times but the bed with the most sun exposure gets 10 minutes and the one with the least sun exposure gets only 5 minutes. With any more water than that, the shade makes the raised bed a comfy place for moss.

garden timers for watering

The rain delay is a little iffy on this brand. I haven't figured out how much rain is required to initiate the delay. Sometimes it sprinkles and the system still turns on. Other times we seem to get the same amount of rain and the system doesn't turn on. In any case, it doesn't turn off after a heavy, long rain so that's worthwhile.

My only complaint is that I wish I could just set the time I wanted the water to come on instead of having to set a "water every" time with predetermined intervals. Maybe a pricier model offers that flexibility. Doesn't matter. We've experienced crazy plant growth since installing the water system.

Before
money saved using timer to water garden

6 weeks later

money savings using drip system irrigation in garden

The tallest twine on the Florida weave is nearly 8 feet and most of my tomato and cucumber plants have surpassed that point. The consistently moist soil helps the roots penetrate deep and spread out to promote healthy plant growth.

We got everything at Home Depot for just shy of $100. I wanted it to cost less of course and it probably could have if we ordered parts online. But it's still worth it. We can leave for vacation without having to pay someone to come water the garden. I don't have to stand outside and water the plants for 30+ minutes every day. That's pretty priceless!

Our water bill has also improved. We're saving 9.5% on water compared to this time last year. I would guess that the savings would be even more if this year was as dry as last year but since we're getting more rain, the rain delay kicks in on the timer and the system starts less often.


Friday, May 23, 2014

Oddly Romantic Date Night

sweet pepper blossom
We were in desperate need of a date night: work stress, family tension, travel planning, and other such nonsense slammed down on us midweek. The rainy evening wasn't ideal for going anywhere but we were determined to get out of our routine and spend some time together.

When Alejandro arrived home, he hopped out of his car and immediately grabbed a shovel from the garage. Since we live at the bottom of a hill, we have drainage systems in place to keep our front and back yards from turning into lakes. When there is a deluge, the drain boxes get clogged with mud so he has to clear them out.

He came back with his dress pants soaked and rolled up to his knees. "Let me show you something so you know what to do if it happens again."

Unclog drains? I know how to use a shovel. I casually followed him to the side of the house. He wasn't talking about the drains.

Our raised beds had turned into muddy swimming pools. The tops of the plants reached their little branches up just above the water line like they were waving for help. My heart sank. We spent so much time getting the garden ready, finding a good soil mix that promoted drainage, and then we get another deluge and our little plants were at risk of drowning. 

At first, Alejandro pulled out a few plastic tubes and taught me how to siphon the water out of the boxes by placing one end of the hose in the garden box and sucking on the other end like a straw. Just as the water reached our lips, we inverted the tube towards the ground and let the water drain out. 

siphoning water using a pipe


DIY water pump


DIY fluid siphon using hose


The little siphons were working but as the rain kept coming we realized that we would be there sucking on tubes until our retirement. My husband suggested buying a hand pump (like the kind used to pump water out of boats). I hurried off to Home Depot.

"So much for date night," I thought.
fiberglass garden hoe
Our little heroes

About 20 minutes and $30 later, I got back with the water pump. First we pumped out as much as we could. As the water became too shallow and dispersed, we dug holes, maybe 6"-8" deep, in the corner of the boxes and gently scraped little channels into the mud leading to the holes. The water followed the channels and filled the holes which made using the pump easier. The pump efficiently sucked water out of the raised beds. 

drainage for raised garden beds
The next morning, you can see the channels and holes
Soon, the plants were no longer swaying in a current of water but rather standing up tall and proud on their own. Most of them. A few pepper plants needed to be supported but we could tell they'd be alright after the leaves dried off. 

By the time that we finished it was 11pm and most restaurants in our town were closed. Our only choices were Waffle House, Taco Mac, and Wild Wing Cafe so we chose the later. It's not my ideal location for a date night but the food and the company were good so I have no complaints. The date night was oddly romantic in the end. What builds a relationship better than overcoming adversity with teamwork?

We have sunny forecasts for the next few days and our garden is already bouncing back. We're even getting a few flowers on the tomato plants!

cherry tomato plant


growing cherry tomato plant


creative raised bed garden ideas


creative raised bed gardening using florida weave


raised bed vegetable garden

More updates to come!

Monday, May 12, 2014

Drop the Bass and Do the Florida Weave, Y'all!

Everyone says the same thing about the Florida Weave when they first hear it: "Is that some sort of dance?" or "That's a hair style, right?" It's not either. It's a method of supporting tomato plants that is cost efficient and more aesthetically pleasing than alternatives.

Last year, we bought several cages for our determinate variety tomatoes. The bottoms of the cages bent as we pushed them into the hard Georgia clay. Over the course of the season, the thin metal frames warped and lost their shine. Buying stronger, vinyl-coated cages for this year would have been an option but at $8 a pop we would've spent nearly $150 and the cages still might not be tall enough to fully support the plants.

I set the cages aside to support my pepper plants (which need less support anyway because the center stalk is so strong) and turned my attention to different support methods for tomatoes. After pricing out a variety of supports, my husband and I opted for the Florida Weave. 

We first constructed 10' tall support posts that are built into the raised beds and buried 2' deep. (The visible support is 8' above the ground.) That sort of support post is not necessary but we felt they would be sturdier, longer lasting, and prettier since they were made of the same pressure treated pine wood as the raised beds. Some gardeners use metal T posts or U posts as supports. Those are strong and work fine but as the soil settles, thin metal posts can lean and look a bit messy.

We then drilled 1/2" holes into the posts.


In areas where we needed to make adjustments, we just drilled a few pilot holes and added 1/4" hooks. Doing this was safer than trying to bore 1/2" holes into the 4"x4" posts with the little plants around. If your measurements are right the first time and your posts line up perfectly, you won't need this step. But we aren't perfect!


The twine weaves in and out around each plant before circling back to bob and weave in the opposite direction. Overhead, the twine makes figure eights around each plant. Garden Betty put together an excellent overhead image of two spacing options. Ours is most like the first option. The second is recommended for much longer rows.
Aerial view of the Florida Weave
The horizontal and vertical spacing between the twine is debatable. Garden Betty, for example, opted to have each side of twine nearly parallel, so that the stem is cradled in the little gap. This spacing provides a lot of support for the stem but it will also require more twine. If woven too tightly, this arrangement can slice into the stem.
Trellising tomatoes with the Florida Weave
via Garden Betty

Garden Betty has 8" between each vertical layer.

In our garden, each single line of twine is spaced about 6" apart. The stem is still nestled between the twine but in a but more of a relaxed S shape. As the plants get thicker and stronger, I don't think the spacing will be a problem. 

Florida Weave tomato support

Some  gardeners, like The Kale Yard, have even more space between each line of twine, though the blogger admits that this isn't the best option. The twine was added after the plants were already quite large.
via The Kale Yard

With any spacing arrangement, some plants will grow faster than others. In our case, one corner of the garden had three short plants among five taller ones. No problem. Just keep an eye on them and gently tuck them through the twine once they're tall enough.


I like the end result and I especially like the price tag! The posts were expensive at $12 each but since they're doubling as Florida Weave posts and emergency row cover posts, I'm pleased. 110' of  twine costs less than $5. Overall, we will need about $15 of twine and we're done!