Social Media

Tuesday, July 15, 2014

DIY Soaker Hose Irrigation

The metro Atlanta area has some insane droughts and heat during the summer. I don't particularly mind the heat but my garden does. Last year's drought meant that I spent 30 minutes in the morning  watering the plants pretty much every. single. day. On super dry days I'd water in the evenings, too. That is a HUGE waste of my time.

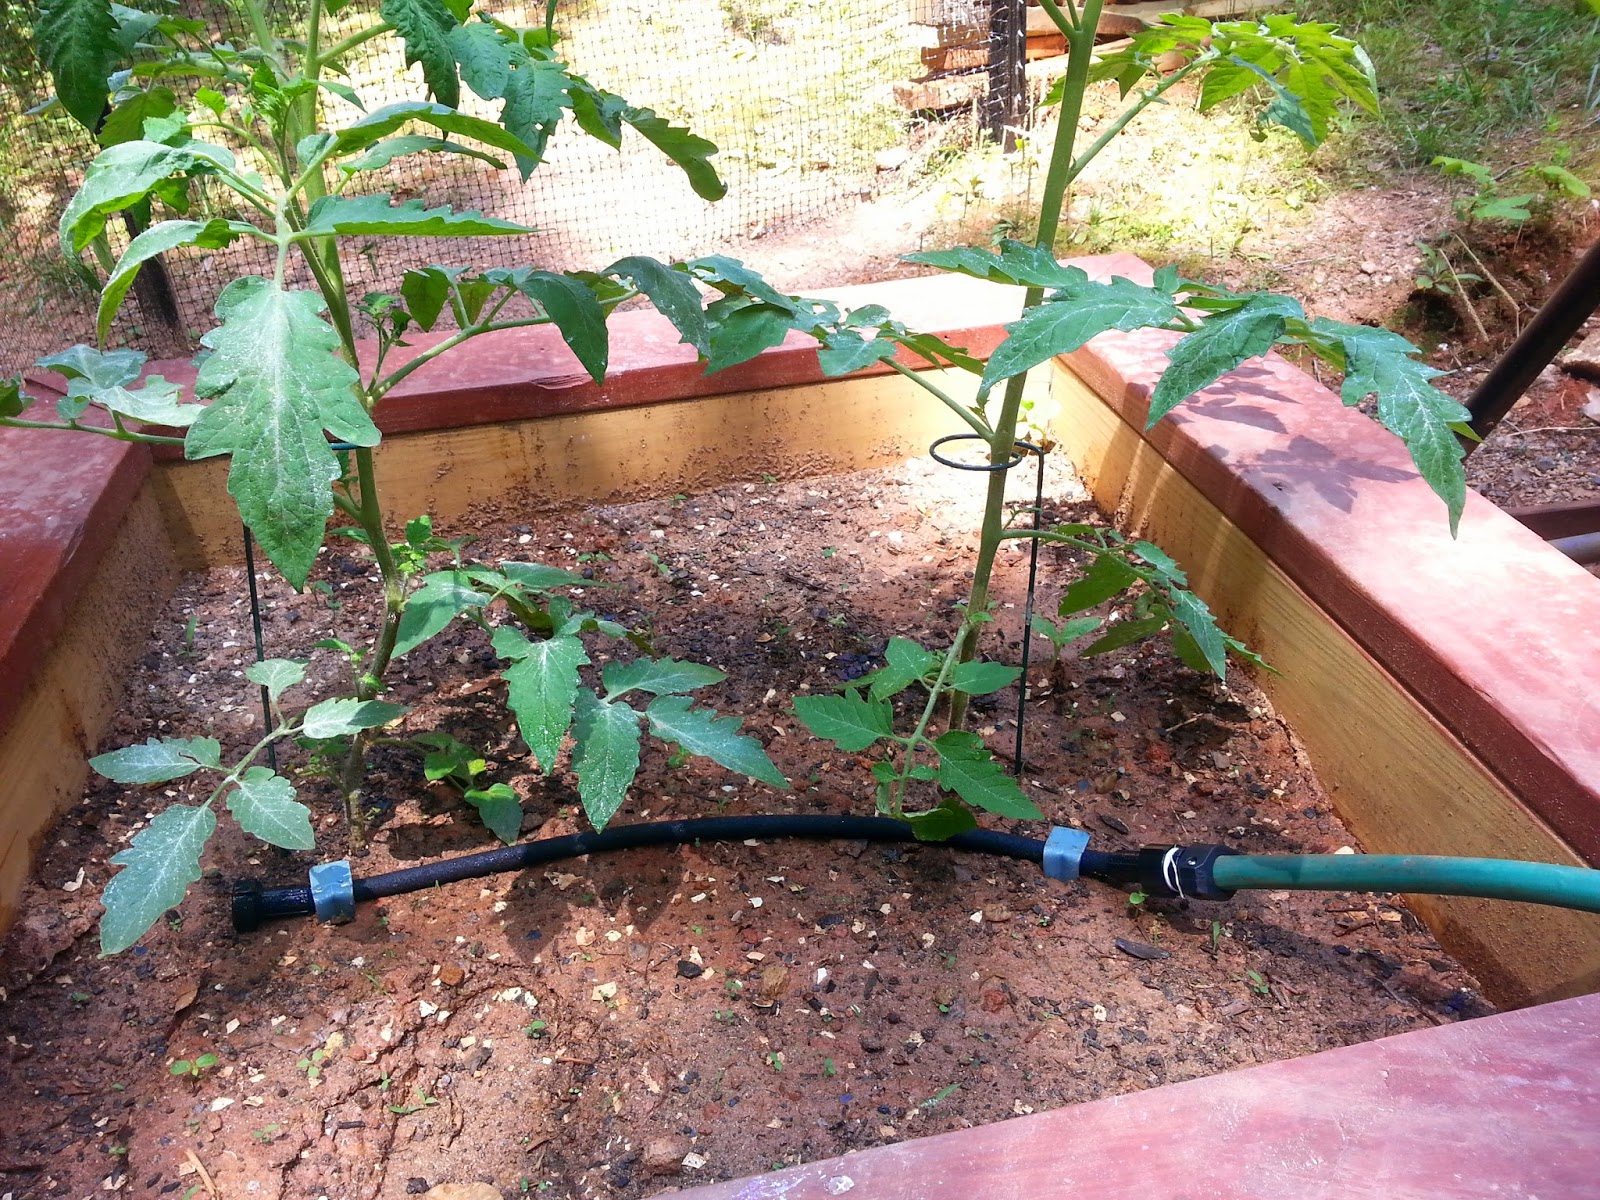
Since my garden spaces are spread throughout the property and awkwardly shaped, I couldn't set up the sort of automatic sprinkler that you would see in front lawns. My husband and I opted for a soaker hose irrigation system set on timers. 

The soaker hoses themselves were inexpensive. We got 100 feet  for $20. The multi-zone timers were the most expensive at $30 each and then the little connectors needed  were $4 each. We needed several of those because our garden boxes are unique shapes. 

drip system irrigation for gardens

The setup is simple:
  • Draw out your irrigation plan and take the proper measurements 
  • Cut garden hose
  • Attach connector (there are males, females, and then T and L shaped options depending on what you're doing) 
  • Tighten clasp that unites connector and garden hose with a screwdriver
  • Insert length of soaker hose needed to fit your garden space
  • Tighten clasp that unites connector and soaker hose with a screwdriver
  • Secure end caps where you want water flow to stop
  • Repeat as needed
We put plumber's tape on the connectors to guard against leaks. We also used stakes to hold the hoses in place but in retrospect that isn't necessary. Having the hoses staked down makes it harder to weed  the garden. The wind isn't going to blow the hose away either since it's set down into the raised beds. We could have saved about $25 without the metal stakes.


drip system in raised bed organic garden


drip system irrigation in organic garden

how to install drip system irrigation in raised bed garden

installing drip system irrigation in raised bed gardens


The Melnor's AquaTimer devices are user friendly and pretty self-explanatory. We have our L shaped and funky quadrangular bed set to water at 5am and 5pm for ten minutes. On the other side of the house, both beds are watered at the same times but the bed with the most sun exposure gets 10 minutes and the one with the least sun exposure gets only 5 minutes. With any more water than that, the shade makes the raised bed a comfy place for moss.

garden timers for watering

The rain delay is a little iffy on this brand. I haven't figured out how much rain is required to initiate the delay. Sometimes it sprinkles and the system still turns on. Other times we seem to get the same amount of rain and the system doesn't turn on. In any case, it doesn't turn off after a heavy, long rain so that's worthwhile.

My only complaint is that I wish I could just set the time I wanted the water to come on instead of having to set a "water every" time with predetermined intervals. Maybe a pricier model offers that flexibility. Doesn't matter. We've experienced crazy plant growth since installing the water system.

Before
money saved using timer to water garden

6 weeks later

money savings using drip system irrigation in garden

The tallest twine on the Florida weave is nearly 8 feet and most of my tomato and cucumber plants have surpassed that point. The consistently moist soil helps the roots penetrate deep and spread out to promote healthy plant growth.

We got everything at Home Depot for just shy of $100. I wanted it to cost less of course and it probably could have if we ordered parts online. But it's still worth it. We can leave for vacation without having to pay someone to come water the garden. I don't have to stand outside and water the plants for 30+ minutes every day. That's pretty priceless!

Our water bill has also improved. We're saving 9.5% on water compared to this time last year. I would guess that the savings would be even more if this year was as dry as last year but since we're getting more rain, the rain delay kicks in on the timer and the system starts less often.



Tuesday, July 8, 2014

Little Garden that Could

We've got veggies! So far, we've been able to harvest lettuce, spinach, chives, basil, cherry tomatoes, cayenne peppers, a few jalapenos and one mysterious lime green pepper. I'm quite proud of my little organic garden that could! I'm excited about the prospect of finding more space and expanding the garden in upcoming years; perhaps we will even have a green house in addition to more raised beds and container gardens on the patio.

For now, I'm just happy with the progress my garden has made and all of the hard work that my husband and I have put into it.

My two cherry tomato plants yield a handful of these juicy fruit every two days, perfect for tossing a few on a salad at lunch time.

organic grape tomato plants  in patio garden

Will someone PLEASE tell us what these are? I didn't plant anything that should look like the peppers below but alas, here they are. They haven't gotten bigger or changed colors in the last few weeks so I'm thinking this is their mature state. The flavor is mild, slightly sweet, not at all spicy. Thoughts?

light green pepper

The cayenne bushes below are multicolored but the purple ones always pop out first. If it's anything like last year, I expect the yellows, oranges, reds, and cream-colored peppers to show their faces towards the end of summer.

ornamental cayenne pepper organic

There are plenty of heirloom and mater sandwich tomatoes, rainbow sweet peppers, Carmen red peppers, jalapenos, and cucumbers popping up each day. It seems like we will have a steady supply of veggies throughout the summer and into Georgia's warm fall.

These guys are about as long as my forearm! But why oh why won't they hurry up and turn red so that we can eat them?! I've read great things about Carmen red peppers on the Park Seed website and I want one in my belly. Now.

organic long red sweet pepper in raised bed garden

Alejandro loves the jalapenos. We will have plenty for salsas and jazzin' up dishes this year.

organic jalapenos in raised bed garden

My first year growing heirloom tomatoes. I'm in love. They're so beautiful! They single-handedly make my garden look more professional.

heirloom tomatoes in different stages of growth

It's my first year having cucumbers, too, and I have really enjoyed watching these guys grow. They're the most entertaining plants in the garden with their lovely large leave and twirling tendrils. I particularly like how spiky the fruit is before it smooths out.

My husband's coworker shared three large cucumbers last week. His garden gets 8 hours of sunlight so everything is ripening much faster. My garden gets only four hours with two additional hours of speckled sunlight so progress is slower. Womp womp womp. But hey, it's coming right along!

growing cucumbers

Mater sandwich tomatoes are interesting at different phases. Sometimes they're  striped, other times pale and even-toned. I can't wait to taste them.

growing mater sandwich tomatoes with trellis in a raised bed garden


organic mater sandwich tomato with twine trellis in raised bed garden

I'm not sure when the strawberries, blackberries, and blueberries will come to maturity. The bushes are getting bigger but no consistent blossoms just yet. All of them are in positions to get 6-8 hours of sunlight a day so hopefully we'll get some delicious fruit towards the end of the season.

The weather has been much more pleasant than last year. We've welcomed hot sunny days with cooling showers in the late afternoon. The leaves have plenty of time to dry before nightfall, avoiding mold and mildew. This system has minimized how much I need to water the garden.

It seems that the plants are much more resistant to disease and weirdness than last year, too. With the exception of one cherry tomato plant (old seed) everything has come up nice and strong. Starting the plants in the BioDome helped because they were stronger and healthier as transplants.

The condition of the soil is also a factor. Having nutrients worked into the soil before transplanting gave them a great head start, versus trying to fertilize the plants from the top down after they were already in the ground. I haven't done too much additional fertilizing in the past few months. I've used Jobe's Organic Heirloom Tomato and Vegetable Food when I transplanted. About two months later, I used Espoma Organic Plant-tone All Purpose Plant Food mixed in with used coffee grounds donated by my local, independently owned coffee shop The Cupbearer Coffee and Tea Outfitters.

organic vegetable fertilizer and coffee grounds


Raking in the fertilizers was scary at first. I raked up the top layer of soil about 2-3 inches and then froze--I had exposed a few hair-sized roots.  I thought I had damaged the plants! Since the supposed damage was already done, I sprinkled a mixture of Plant-tone and nitrogen-rich coffee grounds into the soil and watered the plants thoroughly. Within a few days, the plants had a noticeable growth spurt. The few tiny roots that I interrupted didn't seem to bother the plants.

I haven't applied much in terms of pest control. I'm still using Safer's insecticidal soap but not consistently because of the evening showers that would just wash it away. I only apply it when I have a few days' forecast without rain. The biggest garden helpers have been spiders. I wasn't well-versed on them last year so I would just kill everything that I saw. This year I know better. The spiders been great at munching on winged pests though they don't seem to have a taste for the little worms that eat holes in the leaves, hence my need to spray occasionally. I spray around my spiders' favorite hangouts so that they aren't hurt. (I painstakingly pick off the worms in the areas where I don't spay.) So far, the spiders don't seem to mind. They still eat whatever happens to fly into their webs.